How to Resize an Image
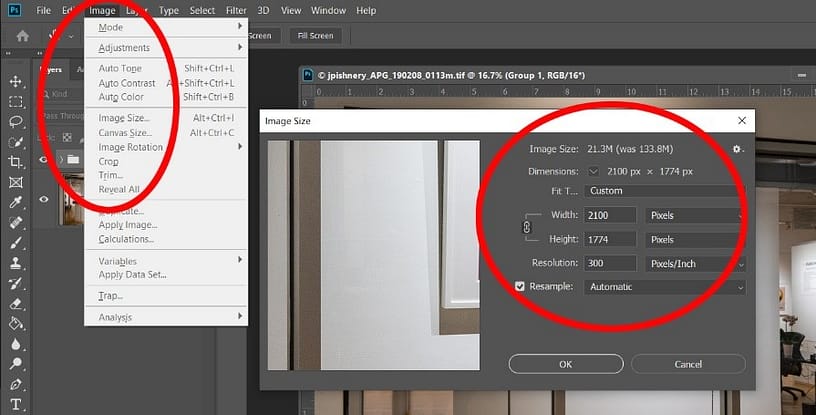
To resize an image in Photoshop:
- Open your image in Photoshop
- Go to “Image”, located in the navigation menu at the top of the window
- Select “Image Size”
- A new window will open
- To maintain the proportions of your image, click the box next to “Constrain Proportions”
- Under “Document Size”
- Select “pixels” for the unit of measurement or the unit of measure you want.
- Input the width or height you desire, if the ‘lock’ is on, when you choose one size the other will change automatically
- Click “OK”
- Choose – File > Save As – rename the file, so the resize image does NOT overwrite/replace your original image
How to resize a photo with Photoshop
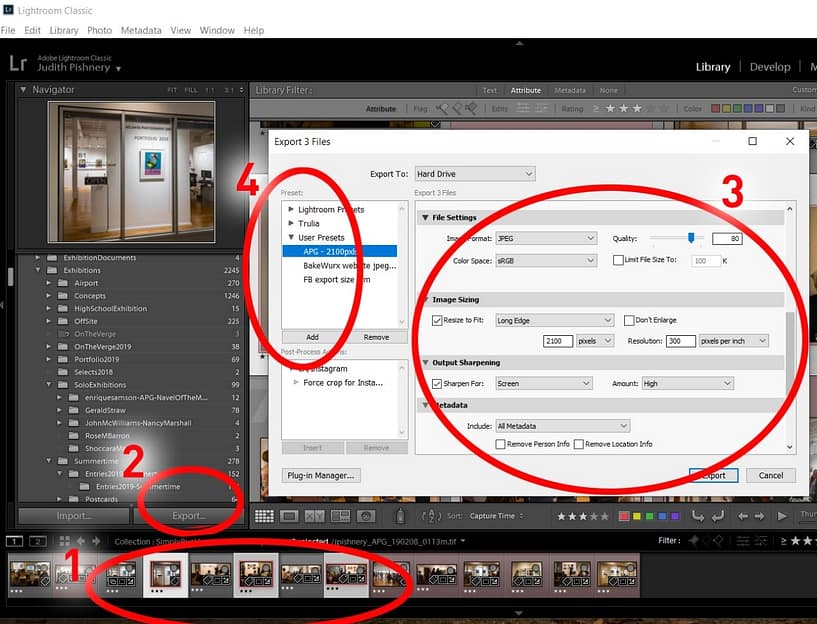
To resize an image in Lightroom:
-
Open Lightroom
1. In Library – Choose/select the image(s) you want to resize
2. Go to Export located in the bottom left side panel or go to File > Export -
A new window will open
3. Choose the Folder where you want to save the exported/resized images
-
You can Rename the files at this time also – see the rename section
-
File Settings – choose
Image Format: jpeg, Quality: 80-100 quality, Color Space: sRGB, -
Image Sizing – choose
-
Resize to fit: Long Edge (do not check, don’t enlarge,
-
2100 pixels (choose this),
-
Resolution: 300, pixels per inch.
-
When you choose the long edge and a size the other will change automatically
Note: the resolution doesn’t matter if you are choosing a specific pixels size, if you choose inches or centimeters, you must set a resolution (300ppi for print; 100ppi for screen)
-
-
Output sizing
Sharpen for: screen
Note: I always choose this for entries that will be viewed on screen. -
MetaData
-
Include: all metadata
-
-
Watermark – do not include a watermark on your entries, we want the entries to be anonymous for the jurors
4. Optional – if you would like to save these settings for future use — go to the left side, under presets, choose Add, and name the preset – this will save all of the settings you just created and can be used for future exports
-
Click “Export”
-
Go to the file folder where you exported these images to check that all of the images you wanted were exported, renamed/if chosen, and resized.